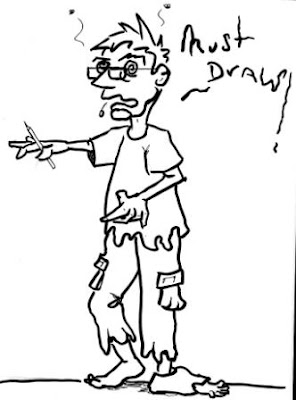
165 Students:
Draw your self as a zombie....
Use your blue pencil to design the basic shape, add the red pencil for detail. No Graphite! and add ink. No need to color your drawings.
We will check them out in class tomorrow. Have fun!
(Yep...! The ones just below are me!)

166 Students:
Please work on the thumbnails for the Godzilla project. We will review tomorrow.
About drawing thumbnails:
Thumbnail Sketches are
Shorthand Notes for Artists:
Thumbnail sketches are drawing quick, abbreviated drawings. Usually, they are
done very rapidly and with no corrections - you can use any medium, though pen
or pencil is the most common. Thumbnails sketches are usually very small, often
only an inch or two high.
Thumbnails are Memory
Aids and Planning Tools:
Thumbnail sketches can serve as a memory aid to help you remember important
features of a subject, when making notes for a painting or drawing. They are
also useful when visiting a gallery, to help you remember important pieces. Often
artists use thumbnail sketches to plan pictures. You can quickly experiment
with format and composition, placing just the major features - such as the
horizon and any large objects, and indicating movement and balance.
How to Draw a Thumbnail
Sketch:
Imagine your subject or picture stripped of all details, through squinted eyes,
or in poor light. All you see are big rough shapes and some lines. That’s all
you need for a thumbnail. First, sketch a rough box, smaller but in the same
proportions as the finished picture might be. Then sketch in the horizon line,
hills, or any major verticals or horizontals. The outline any key shapes, and
quickly hatch in any strong dark areas. There are no right or wrong ways -
that's my approach, and it might work for you.
Thumbnails can be
Colored:
Thumbnail sketches are a great way to plan color schemes. Use colored pencil or
watercolor to put in major areas of color in your picture. Small but intense
colors can also be noted, as these can attract the eye, but don't get bogged
down with detail.
Making Notes and Working Drawings:
Once you've done your thumbnail sketch, you might want to make some notes
alongside it. If at a gallery, you can record the artist's name and the title,
along with your thoughts about the painting. If sketching outdoors, you might
record notes about the position of the sun, the particular colors, or make
additional sketches to show small details. If you are planning a painting, you
might want to do a working drawing. A working drawing is usually fairly large,
sometimes as big as the finished piece, and carefully composed.


